
Table of Contents
- Why Removing Clothing Tags Matters for Comfort
- Identifying Your Label Type Before You Start
- How to Remove a Sewn-in Clothing Label Safely
- How to Remove an Iron-on Clothing Label
- Best Tool for Removing Clothing Labels
- How to Stop Clothing Tags from Itching Without Removing Them
- Repairing Accidental Damage During Tag Removal
- Why Sensory-Friendly Tag-Less Clothing Is Worth Considering
- Frequently Asked Questions
Last Updated: October 12, 2026
Why Removing Clothing Tags Matters for Comfort
Many children experience genuine distress from clothing tags. The irritation isn't imaginary. Tags create constant friction against sensitive skin, causing itching, redness, and real discomfort that can ruin an entire day.
For children with sensory processing differences, autism, or sensitive skin, a single scratchy tag can make a garment unwearable. At Doodlebug's Children's Boutique, we understand that comfort directly impacts a child's confidence and willingness to wear clothing.
The good news: you don't have to live with itchy tags. Learning how to remove clothing tags without damaging fabric gives you options. You can rescue garments your child loves, extend the life of quality pieces, and create a more comfortable wardrobe overall.
This guide covers everything you need to know about safely removing tags while protecting your fabrics. We'll show you the difference between label types, walk you through the safest removal techniques, and explain what to do if something goes wrong.
Identifying Your Label Type Before You Start
Not all clothing tags are created equal. Before you cut anything, you need to know what you're dealing with. Different label attachment methods require different removal approaches.
Sewn-in labels versus security tags
Sewn-in labels are stitched directly into the fabric seams. These are the most common type on children's clothing. You can safely remove them with the right technique.
Security tags are a different animal entirely. These hard plastic or metal tags are designed to prevent theft. They're not meant to be removed at home. Attempting to cut them can trigger internal mechanisms or damage the garment permanently. If your clothing has a security tag, contact the retailer, they have the proper removal tools.
Here's the key difference: sewn-in labels feel soft when you touch them. Security tags are rigid and plastic-like. Run your finger across the tag. If it's flexible cloth, it's a sewn-in label. If it's hard and plastic, leave it alone.
Checking the attachment method
Before cutting anything, examine how the label is actually attached. Look at the edges where the label meets the garment.
Top stitching is the most common method. You'll see a visible line of thread running around the label's perimeter. This is the easiest type to remove safely.
Basting stitches are looser, temporary-looking stitches. These are actually easier to remove than top stitching because the thread is less secure.
Hem-attached labels sit inside the hem of a garment. These require more care because you're working near folded fabric.
Spend 30 seconds examining your specific garment. Look at the label from both sides. Identify which stitches are actually holding the label in place. This single step prevents most removal accidents.
How to Remove a Sewn-in Clothing Label Safely
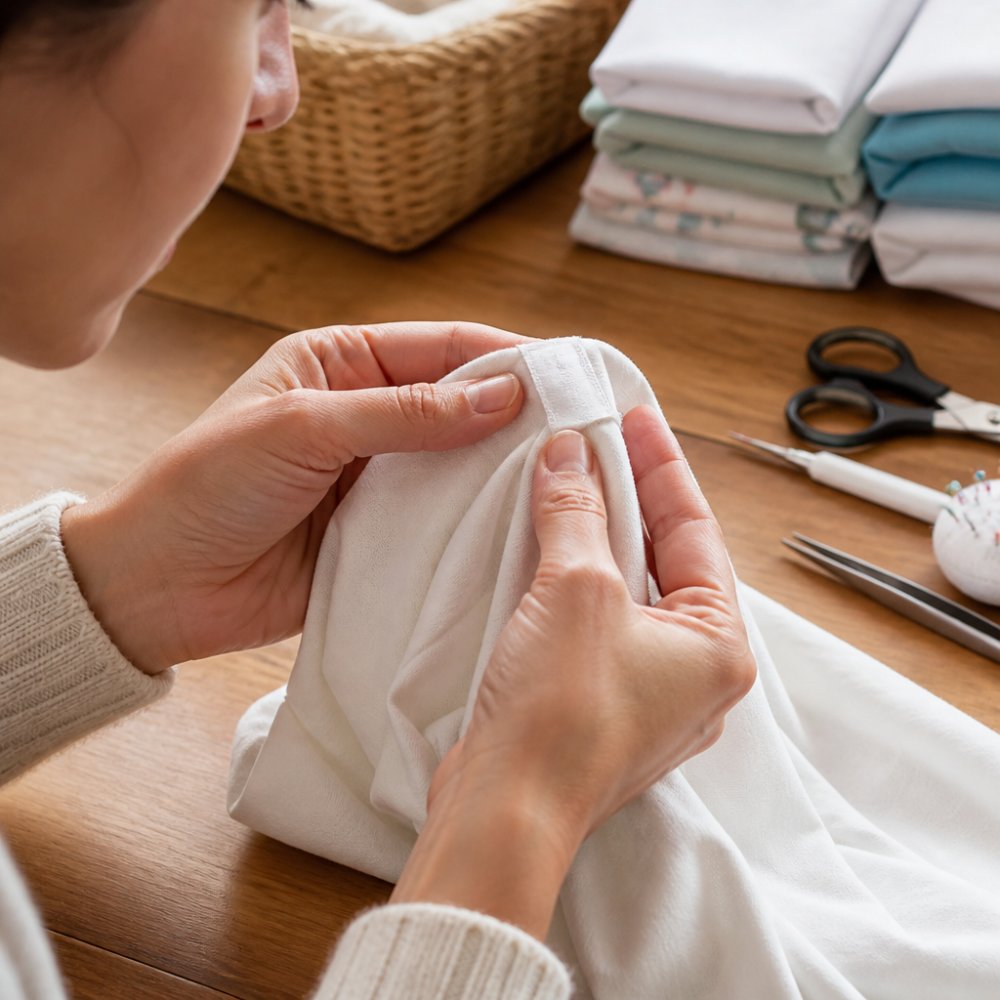
Removing a sewn-in label is straightforward when you follow the right steps. The key is working slowly and protecting the fabric underneath.
Step-by-step removal process
Step 1: Lay the garment flat. Spread the clothing on a clean, flat surface. Position the label so it's easily accessible.
Step 2: Locate the stitches carefully. Look at where the thread enters and exits the fabric. Most labels have stitching around all four edges.
Step 3: Cut one stitch at a time. Using small, precise scissors or a seam ripper, cut a single stitch. Cut only the thread, not the fabric.
Step 4: Gently pull the thread free. After cutting each stitch, gently tug the thread. It should slide out easily.
Step 5: Work around the entire label. Continue cutting stitches around all four edges. You'll typically find 20-40 stitches total, depending on label size.
Step 6: Remove the label. Once all stitches are cut, the label should lift away cleanly. If it's stuck, you've missed a stitch.
Step 7: Clean up loose threads. Trim any thread remnants close to the fabric. A small lint roller removes loose fibers.
Protecting delicate fabrics during removal
Certain fabrics require extra care. Knits, stretchy materials, and lightweight fabrics are more vulnerable to damage.
For stretchy fabrics (lycra, spandex blends): Work even more slowly. These fabrics snag easily. Use a seam ripper instead of scissors. The small blade gives you better control.
For lightweight materials (cotton voile, linen blends): Support the fabric with your other hand as you cut. Don't let the fabric hang loose while you work. This prevents accidental tears.
For delicate knits: Cut stitches from the inside of the garment when possible. This protects the outer surface from snags.
For embellished clothing: If the label sits near sequins, beading, or appliqués, work around those areas carefully. Avoid cutting near decorative elements.
The universal rule: never pull hard on anything. If you're forcing it, something is wrong. Stop, reassess, and try a different angle.
How to Remove an Iron-on Clothing Label
Iron-on labels use heat and adhesive instead of stitches. Removal requires a different approach entirely.
Iron-on labels are less common on children's clothing, but they do appear on some brands. You can identify them by their plastic-like appearance and the way they sit on top of the fabric rather than being sewn in.
The safest removal method uses heat. Apply a warm iron to the label for 30-60 seconds. The heat reactivates the adhesive, making it pliable. Gently peel the label away from one corner. Work slowly. If it resists, apply more heat.
For stubborn adhesive residue left behind, use rubbing alcohol on a small cloth. Dab the area gently. The adhesive should soften and roll off. Test on an inconspicuous area first to ensure the alcohol doesn't damage the fabric color.
Never use sharp tools to scrape iron-on labels. You'll damage the garment fabric underneath. Heat is your friend here.
Best Tool for Removing Clothing Labels
The right tool makes tag removal safer and faster. Different tools work better for different situations.
Seam ripper versus scissors
A seam ripper is a small, specialized tool with a curved blade and a tiny ball at the tip. The ball sits under the thread while the blade cuts above it. This design protects the fabric underneath.
Seam rippers are ideal for:
- Delicate or stretchy fabrics
- Labels with tight, dense stitching
- Detailed or intricate sewing work
- Anyone who wants maximum control
Small scissors (embroidery scissors work best) are sharp, precise tools with short blades. They give you good visibility of what you're cutting.
Scissors work well for:
- Sturdy fabrics like cotton
- Labels with loose or visible stitching
- People who prefer familiar tools
- Quick, straightforward removal
The honest truth: a seam ripper is safer. The ball protects fabric from accidental cuts. If you work with children's clothing regularly, invest in one. They cost around five to ten dollars and last for years.
Other helpful tools and techniques
Tweezers help you hold threads steady while you cut. They're not essential, but they add another hand when you need it.
A magnifying glass or phone camera zoom helps you see stitches clearly, especially on small labels or dark fabrics.
A lint roller cleans up loose threads after removal.
Rubbing alcohol removes adhesive residue from iron-on labels.
A small towel or cloth protects your work surface and gives you a stable base for the garment.
The best toolkit is simple: a seam ripper or small scissors, tweezers, and a magnifying option. Everything else is optional.
How to Stop Clothing Tags from Itching Without Removing Them
Sometimes removal isn't practical. A label might be structural, or you want to preserve the care instructions. You have options that reduce irritation without taking the tag off.
Fold the tag inward. If the tag sticks outward, fold it toward the inside of the garment.
Cover the tag with fabric. Sew a small piece of soft cotton or bamboo fabric over the label.
Apply hemming tape. Heat-activated hemming tape can seal the tag's edge, reducing fraying and scratching. Iron it in place following package directions.
Use a tag guard or cover. These small fabric sleeves slide over tags. They're designed specifically for this purpose and work surprisingly well.
Trim the edges carefully. If the label's edge is the problem, carefully trim loose threads and smooth the edge. Don't remove the label, just neaten it.
For children with severe sensory issues, these modifications often work better than full removal. They preserve the care label while eliminating the itch.
At Doodlebug's Children's Boutique, we recognize that some families prefer tag-less alternatives altogether. Our sensory-friendly clothing collection features labels that are either completely removed or integrated into seams in ways that don't irritate sensitive skin.
Repairing Accidental Damage During Tag Removal
Mistakes happen. You cut too deep, pulled too hard, or the fabric tore. Here's how to fix it.
Small holes or snags: Use a needle and thread that matches the garment.
Pulled threads in knits: Use a crochet hook or needle to pull the loose thread back through the knit loops.
Torn seams: If you accidentally cut into a seam, restitch it using a needle and matching thread. Follow the original stitch line.
Fraying edges: Apply a tiny amount of clear fabric glue to the frayed edge. Let it dry completely.
Discoloration or marks: Sometimes the removed label leaves a faint outline. Wash the garment normally. Most marks fade after one or two wash cycles.
The key is addressing damage quickly. Don't wait. Fresh damage is easier to repair than old damage that's been through the wash.
If damage is severe, consider taking the garment to a tailor. A professional can often repair what seems irreparable.
Why Sensory-Friendly Tag-Less Clothing Is Worth Considering
If tag removal becomes a regular task, it might be time to rethink your clothing choices. Tag-less options eliminate the problem entirely.
True tag-less clothing has labels integrated into seams or printed directly on fabric. No separate tag means no itching, no removal needed, no accidental damage.
Sensory-friendly clothing serves children who experience genuine distress from standard tags. This includes children with autism, sensory processing differences, and sensitive skin conditions.
Quality tag-less clothing often uses organic or bamboo materials. These fabrics are naturally softer and less irritating than standard cotton blends.
The investment in sensory-friendly clothing pays dividends. Your child wears the clothing without complaint. You don't spend time removing tags.
Doodlebug's Children's Boutique specializes in exactly this approach. Our tag-less collection features organic and bamboo clothing designed for comfort from the moment your child puts it on.
Removing clothing tags without damaging fabric is absolutely doable when you know the right techniques.
We recommend exploring clothing designed with sensory comfort in mind.
Frequently Asked Questions
What's the safest way to remove a clothing tag without damaging the fabric?
The safest method depends on how the tag is attached. For sewn-in labels, use a seam ripper to carefully cut the stitches holding the label to the garment, working slowly to avoid puncturing the fabric underneath. For iron-on labels, apply low heat with a clothes steamer or iron to loosen the adhesive, then peel carefully. Always work in good lighting and test on a hidden area first if you're unsure about the fabric.
How do you remove a sewn-in clothing label without cutting the seam?
Identify which stitches attach the label to the garment, these are usually different from the seam stitches holding the garment together. Use a seam ripper to cut only the label's attachment threads, not the garment's structural seams. Work from the inside of the garment when possible, slide the seam ripper under each stitch carefully, and lift the label away once all threads are cut. This preserves the garment's integrity while removing the itchy tag.
Can you remove a clothing label after washing the garment?
Yes, you can remove labels after washing. In fact, washing first can make removal easier because the stitches may loosen slightly. However, check that the label is still securely attached before attempting removal. If the label has started to fray or come loose, be extra careful during removal to avoid pulling threads from the garment itself. Always let the garment dry completely before working with it.
What should you use to remove a clothing tag safely?
A seam ripper is the best tool for most sewn-in labels because its small, curved blade lets you cut threads precisely without puncturing fabric. Small sharp scissors work as an alternative if you have a steady hand. For iron-on labels, use a clothes steamer or low-heat iron with a pressing cloth. Avoid pulling or tugging at labels, always cut or heat them away. Keep the garment stable on a flat surface while working, and use good lighting to see the stitches clearly.